Monday, April 29, 2013

Southern Delights: Sunday Supper

Hey Y'all! Okay, so every now and then I will share some of my awesome (usually made up) recipes. I {love} to cook- always have... however, I don't always have the time to cook a real, southern, homemade meal. It's probably for the best because I sure don't skimp on the butter.


Southern Delights: Sunday Supper
  • Honey Baked Ham
  • Homemade Macaroni and Cheese
  • Amber's Southern Turnip Greens with Cornmeal Dumplin's
  • Kelley Family Butter Muffins


Homemade Macaroni and Cheese:
2 cups uncooked elbow macaroni
1/2 stick butter
3 1/2 cups shredded cheddar cheese; divided
1/2 cup sour cream
1 can cheddar cheese soup
1/2 tsp salt
1/2 tsp pepper
1/2 tsp dry mustard
1 cup milk

Preheat oven to 350. Boil and drain macaroni. Mix butter and shredded cheese in pot until melted and mixed well. Set aside 1 cup of shredded cheddar cheese. In the pot with the melted butter and cheese, add the rest of the ingredients, including the cooked elbow macaroni. Mix well. Add macaroni and cheese to greased 13 x 9 pan. Cover and bake for 30 minutes. After 30 minutes add the remaining cup of shredded cheese and bake uncovered for an additional 5-10 minutes or until the cheese has melted.


Amber's Southern Turnip Greens with Cornmeal Dumplin's:
1 bunch of Turnip Greens
1 stick of butter for greens (you will need more for frying)
3 beef bouillon cubes
1 pound of bacon
1 onion sliced
1 garlic clove ( I used 1/2 teaspoon of minced garlic) 
2-3 cans of chicken stock (see cook's notes)
1 tsp sugar
3-4 dashes Worcestershire sauce
lots of dashes of hot sauce (depending on how hot you like it)
1/2 tsp of cayenne pepper
salt & pepper to taste
1/2 tsp of garlic powder
1/4 teaspoon ground ginger

Wash greens REALLY good. I find it best to go ahead and strip the greens free of the stalk, slice and chop them, then wash them WELL. It's a bit easier to get all the sand off. You will probably want to wash them 2-3 times just to make sure. Again, it's easier when they are cut first. Set greens aside in large stock pot. Go ahead and slice your onion. Now, take your bacon and cook it, then crumble or dice and set aside. In the same pan, using the bacon grease, saute the onions and minced garlic until it's caramelized. Once it is cooked, pour the entire pan into the pot of greens. Yes, all of it. Don't strain out the bacon grease.
To the pan, add the bacon and 2 cups of chicken stock. Now add the remaining spices and beef bouillon cubes ( I crunch them up before adding them to the pot). Bring pot of greens to a rolling boil. Once it's boiling, I usually turn to a medium- low and cover. Cook this for about an hour to an hour and half. 
*2 cans of chicken stock is usually plenty for covering the greens to be able to cook. Chicken stock doesn't evaporate like water does, it takes a lot longer to evaporate. So if you need more chicken stock, only add a little at a time. Otherwise, you will be scooping out stock because you will have too much. You aren't making soup here, people. You don't want your greens to be dry, but they don't necessarily need a life jacket either. Ummmkay?  After about an hour, the greens should be cooked down. It's okay if you have a bit more stock in the pot than you would like. You will need 2/3 cup of the liquid from the greens to make the dumplin's (see recipe below).  If you don't have enough liquid in your pot to accommodate 2/3 cup of liquid for the dumplin's, then just use straight chicken stock. Once you have cooked your dumplin's and added them to the pot, give it one quick stir and you are finished! *this is usually when I taste-test to see if it needs more hot sauce.

Cornmeal Dumplin's:
1 cup all-purpose cornmeal
1/2 teaspoon salt
1 egg
2/3 cup liquid from the greens

Take your liquid and boil in a small pot. Mix all ingredients together. Take about 1 tsp of the dough and roll into a ball into the palm of your hands. Drop each ball into your pan. Boil for 7-10 minutes. Then pour the entire pot into your greens. You may have to shake the pot to keep the balls covered with the liquid. It's okay if they are not perfectly round and pretty. They still taste good!  


Kelley Family Butter Muffins:
2 sticks of real butter, softened- you will need more to grease muffin pan
1 cup sour cream
2 cups self-rising flour

Preheat oven to 400. In large bowl, mix butter and sour cream together well. Then, add the flour one cup at a time, mixing well between the 2 cups. When everything is smooth and free of clumps, add to buttered (not sprayed) muffin tin. Butter that muffin tin good, darlin. These aren't called butter muffins for nothin'. Cook for about 15-17 minutes or until the tops are golden brown. Wait about 5 mintues, then add a big ole dollop of butter to each muffin. Don't skimp on the butter.


Okay, so for the ham, I'm not going to lie...I totally bought a precooked ham! You know what? It was just as good. Cook the whole ham on 275 for about 3 hours. With a precooked ham, you really want to cover it well. Otherwise, it will dry out on you.


That's it! I hope y'all enjoy your sunday supper!
      ....now, I'm off to work off all that dang butter...

Don't forget to link up with me every Sunday night for Moonshine Monday! :)

Sharing with:
PJH Designs
Cozy Little House

Moonshine Monday Linky Party #12

Hey Friends! How the heck are you?? Sorry, I'm a bit late on getting the party started. I've had a super-duper *busy* weekend. Successful, but busy. I am almost finished with my kitchen island. It needs a little bit more dark wax applied, then it will be completed. Also, this weekend, I repainted several frames, mirrors, etc.... AND, I did some redecorating around the house.

I will be posting later this afternoon with my first segment of Southern Delights. Oh. My. Gosh. I hope you're hungry. What I have to share with you will make you gain at least ten pounds make your mouth water! Seriously. Meet me back here this evening, people!

Now, onto the features!

Evocative Vintage shared this fun, creative bird photo collage. I'm totally in love with the fact that it has depth and texture. It's really funky. Another idea that would be neat is if you had an old black and white picture of a guitar (put it on canvas) and added old, funky jewelry to the photo for texture. Really, anything. Just glue on some random *junk* and BAM- you've got art!

 
Living and Learning with Luisa shared this {beautiful} picture of her azalea plant in full bloom. Ummm, I seriously need to get one of these bad boys for my yard. Just seeing that color makes me smile :)
 
 
Distressed Donna Down Home shared this adorable, fun taxi chair. How different is this?? The possibilities are endless for decorating and accenting with this chair. This would also be great for a little boy's room.  If you're creative enough, you could even do a firetruck "chair" and kind of roll with a New York theme for a kids room. Fun, Fun, Fun.


Alrighty party people. Get to linking up! I truly love seeing what y'all share each week! It gives me design inspiration as well as everyone else.
 
Also, don't forget to come back later for Southern Delights. :)


Sunday, April 21, 2013

Moonshine Monday Linky Party #11

Hello, Hello! It's that {party} time again! What have y'all been up to?? This past week, I've been working on, well, a lot. I'll work on a project, then get tired of messing with it, so what do I do? Move on to another. I know, I know. This is a horrible method! It drives my husband crazy. I am, however, getting much better at NOT doing this! :) I started on my kitchen island revamp- nothing major, just giving it a face lift. Also, I started on some DIY art work for the fireplace.  What is it you ask? A surprise. I should be finished this week with it, then I will share with you what it is.

So, what did you do this past week? Link up and share!!

Here are this weeks features:

A Vintage Green shared this adorable DIY chalkboard project. She's right, it really is a fun alternative to a wreath outside....why not a welcoming chalkboard instead? It's fun. It's different. I love it.

 
Our Fun with Five shared her kitchen thrift store finds. Ummm, is this vintage pie tin not adorable?? I would definitely display that bad boy for all to see.
 
 
Last, but not least, Redoux Interiors shared this fun dresser that has been aged by layering paint.  Seriously *in love* with this beautiful revamp! The colors selected really accentuate the details and curves and really give it a divine patina...and you HAVE to check out the wheels she added to the bottom. Yes, please!!
 
 
If you were featured, grab a button! Have a great week!!


Sunday, April 14, 2013

Moonshine Monday Linky Party #10

OH MY LORDIE JESUS. I am so taken back by the emails and comments that y'all have left me. Everything has been so positive, uplifting and sweet. THANK YOU. I created this blog as an outlet, as design has always been a hobby and passion of mine. Y'all have truly made my blogging life worthwhile. I hope to encourage everyone to pursue their hobby and take it to the next level and to never stop dreaming. I think the first time my husband met my Grandma Margaret- she said,  "Well, hunny, get ready because she wakes up in a new world everyday." ---> God Bless Grandmas, right? ...at least she was honest...FYI, he married me anyways :)

So, guess what? Chicken squat! ( I'm sorry, I had to throw that in there, my Momma always says that to me and it makes me smile). No really, I have started painting my island AND I have officially started my Etsy store. Yes, that's right, it's up and running. I really put a lot of time and effort into each piece I sell.  I really hope that you love and appreciate them the way I do.

Here are a few pieces that I have added recently. I have a few more to add hopefully within the next 1-2 weeks. Everything is available in my Etsy shop.


Now onto the features!

 
Tatter and Fray shared their take on spring and decorating and let me tell you, I am in *love*.  In fact, this blog is full of everything fabulous and I highly recommend you check it out...after you link up :)


I got this Martha shared the recipe for Hawaiian Coleslaw. Okay, so I LOVE coleslaw and Hawaii (who doesn't, right?) My husband and I took a trip to Kauai and Oahu in 2010 and it was seriously the most awesome-est (yes, I went there. Say it with me now, Awesome-est.) trip we have ever been on. So when I saw this recipe, I had to feature it. Trust me when I say that I will be making this soon.


                               She had me at butter. Turnips 2 Tangerines created this delightfully yummy, stick to your boo-tay dish- Buttermilk Peach Scones with White Chocolate Chip Glaze.   Honeychild, after this, you better go to church and repent because this dish is sinfully good.

 
We southern ladies LOVE us some tea parties. Sweethearts and Sweettarts created this adorable petal top tea party favor box. Ummm, Yes please- over here! I want one. Is there chocolate in the box? If so, I'll take two...maybe three.     Just go with three, ummmmkay?
 
 
If you were featured, feel free to grab a button! Heck, if you weren't featured, go ahead and grab a button. I'm pretty sure the button police will not come after you. I had a hard time choosing features because as usual there were so many good ones. Thank you to everyone who linked up!


Sunday, April 7, 2013

Moonshine Monday Linky Party #9

Hey Y'all! I'M BACK! ...and let me tell ya, it's good to be back. Thank you to all who have inquired about when I will be back at blogging. That truly means a lot! I simply needed a break. Since starting this blog, I have been running around like a chicken with my head cut off, taking care of and spending time with my family, cooking, cleaning, etc, etc. Design is truly a passion of mine. However, I have found that in the past few months, it has taken up more time than it should. My family will always come first. You know who I am? I am a wife and mother. Sometimes those two combined can make your head spin. You lose track of time and how to juggle it. You know what, though? I'm successfully learning how to use the extra time I'm given wisely, which is sometimes easier said than done. Writing really is therapeutic for me as well as working on different projects. I can't wait to share with you everything I have been working on. Let me tell ya, I'm pretty dang proud of it if I do say so myself. Coming up, I plan on sharing with you more DIY projects and Southern Delights. Southern Delights will be different cooking segments that I will insert in between projects. However, I ain't afraid of the butter when I cook, so you may wanna watch out. If you gain 5+ pounds after one meal, don't say I didn't warn you. Just sayin'.

Again, thank y'all so much for all the emails and inquiries! MUAH!

Alrighty now. Let's get down to business. Ya ain't gotta follow me or none of that crazy crap to link up, just please make sure to link back so other's know where they can share their projects. Way back when, I would sometimes have trouble finding different parties to link up with because folks didn't include where the heck they partied at. Don't be a party pooper or party crasher, ummmmkay??


Sunday, March 24, 2013

{Moonshine Monday} Linky Party #8

Hey Y'all! I hope everyone had a great weekend :)

Before we get into Moonshine Monday, I wanted to update you on my dining room. I'm almost finished. I have a few chairs that still need to be waxed/distressed and then I will need to select the fabric. For now, I just threw the cushions back on the chairs. I'm thinking of a neutral fabric. Nothing too fancy or trendy- just something classic looking. I should be completely finished here in the next 2 weeks so I can start working on my island. I plan to repaint it Annie Sloan's Chateau Grey.


I'm loving how the white looks with my flower arrangements. It sort of brightens everything up around here.


Charlie, my little helper. This is the look he makes when the boys are coming close to him...they usually try to ride him like a horse...or pull his tail, ears, etc. Bless this sweet dog's heart!
 
Featured this week is Living and Learning with Luisa with this adorable DIY He is Risen Easter cloche. Very creative and I'm loving that moss covered cross.
 
 
Okay, guys, onto the party! Have fun!


Sunday, March 17, 2013

{Moonshine Monday} Linky Party #7

Yay! It's that time again- Moonshine Monday! I'm still in love with the name of this link party. I hope you are, too. So, I have TONS going on right now. Sorry, I haven't been blogging much- I promise to do better. I'm currently finishing my dining room table while working on several items for my shop.

Let me tell you- they are FABULOUS. I keep having to remind myself that I can't keep them. I have a problem with wanting to keep everything that I make! A couple of the items that I will be adding very soon to my shop are an antique liquor cabinet and an antique depression-era china cabinet. That's just a couple! Man, I'm busy. Busy in a good way though.

I will be posting very soon (possibly tomorrow) an update on my dining room table. It's really coming along and I am so happy with the transition.

Now, on to the party! OK, so I am truly impressed with everyone's link-up's. Like, for real.

Here are a few of my favorites!

 
Donna @ Distressed Donna Down Home shared this super cute framed cloth hares for Easter. I'm totally admiring this and thinking about all the endless possibilities...hmmm, maybe a vintage witch picture for Halloween?


Next up is Christine  @ Little Brags with her Spring-inspired porch. Check out that antique milk can and you'll for sure have to visit her blog to check out the reinvented spring lantern. It's fabulous.

 
Nicki @ Sweet Parrish Place shared this DIY stenciled lampshade. I think it is absolutely adorable. You should keep this in mind for the next time you come across a not-so-pleasant lampshade at a yardsale or the Goodwill. Although this was beautiful to begin with (gotta love burlap), Nicki truly made this piece shine.
 
If you were featured, grab a featured button!
 
I would love for y'all to follow me but it's not mandatory. However, I do require a backlink.
 
Y'all have fun!


Sunday, March 10, 2013

Moonshine Monday

It's that time again! I'm so ready to see the amazing link up's this week! Y'all are friggen awesome and full of creativity. By the way, I'm almost finished with my dining room table. Just gotta find the right fabric. Do y'all have any suggestions for places to buy fabric online that doesn't cost an arm and a leg? Feel free to comment below if you do!

 
I have some awesome features to share with you.
 
First up is Life on Lakeshore Drive with this oh-so-cute Easter Bunny wreath. She shares the full tutorial for making this fun, creative wreath. You really should check her site out! Oodles of inspiration can be found there.
 
 
I mean...seriously. How cute is that??
 
 
Sweet Nothings shared the recipe for strawberry cobbler and let me tell ya, it looks YUMMY. I highly suggest that you make it... just pretend that it's fat free, sugar free and has no carbs while you're eating it and you should be good to go. If you're like me, you eat one donut and your butt jiggles for a week. Oh well. That bad boys cobbler is totally worth it.
 
 
Savvy Seasons shared this Tuscan, Spring-inspired mantle and I LOVE everything about it. I'm loving all the greenery she incorporated and that boxwood wreath really sets everything off. This site is full of inspiration. Go there. Now. Well...actually, you need to link up first, then go there. Ummmkay?
 
 
If you were featured, grab a button!
 
 
Alrighty party people. Get to linking up!


Welcome to the Farm: Spring Buffet

Hey people! Spring is almost here and you know what comes with it.....yard sales!! My favorite. I love this time of year. I scored some awesome, old mason jars at the first sale. I kind of freaked out a little on the inside when I saw them. 2 for $10 bucks- not bad. Now, I did kind of have to fight for one of those bad boys. I asked the man in charge if it was "safe" to place my jars on the table while I ran to my truck really quick. He said yes...I came back to ONE jar. The guy had to track down the lady that took it, blah blah blah, she didn't want to give it back- there was an argument- BUT, she finally gave him the dang jar. I walked out of that place with a death grip on the jar for fear that chick would come and jump outta the bushes and steal my mason jar. Don't worry- I was totally ready for an unexpected attack so I can finally put my Chuck Norris skills to use.

Moving on, I came home and rearranged a few things on my buffet to give it more of a spring vibe. I love it! Also, I purchased these new little feed sack pillows here. They are so adorable.


Y'all don't forget to come back tonight for Moonshine Monday. I have some awesome features. I'm pretty sure you'll love them, too!
 
~Smooches~
Amber


Pssst....I'm linking with:


Wednesday, March 6, 2013

{DIY} Spring Topiary

Hey guys! I recently shared with you my fireplace reveal and the {diy} easter egg topiary. I know, I know...Y'all are probably so tired of looking at my fireplace! BUT, I did promise to break everything down for you.

This last tutorial is so easy that I really don't even need to explain, I'm pretty sure I could show you pictures and you would be able to make it!

 
OK, so start with a styrofoam cone. I bought mine from Wal-Mart already covered with moss. How great is that?? However, if you choose to buy it without the moss already on it, just hot glue some moss on yourself. Simple as that. Next, get your flower pot. I bought mine from the dollar tree and painted it just like I did with the Easter egg topiary. Then, I took my styrofoam circles and doubled them up in my pot to create some height. I also got them from the dollar tree...I'm cheap, remember?


Ok, so then you want to make a thin layer of moss over the styrofoam circles. Not a whole lot...just enough to cover the styrofoam.


Then, take some toothepicks and insert into the bottom of your cone. This will secure your cone in place with the styrofoam circles. You can't have it falling over.


Last, fill in the space around the cone with your spanish moss. Make it as full as you want. I kind of wanted mine to overflow the pot, but you don't have to put as much if you don't want. 

                         That's it, youre done!


NOTE:  I completed the spanish moss wreath a long time ago. All I did was buy a styrofoam wreath from Hobby Lobby ( the same wreath can be found at the Dollar Store and Wal-Mart) and hot glue spanish moss on. Then, I finished it off with burlap ribbon. The frame was purchased at the Goodwill for $4.00 and spray painted black.

I hope y'all enjoyed! I'm going to get back to my dining room table...and my island...and my armoire...Lord, I have too many projects going on! :)

                              ~Smooches~
                                  Amber


Pssst....I'm sharing with:
Savvy Southern Style- Wow Us Wednesdays


Monday, March 4, 2013

{Moonshine Monday}

Hey y'all! Please forgive me, as I am running behind on everything. WOW- what a crazy week I've had. I have several projects going, plus, did I mention I'm a stay-at-home Mom?? Busy is my middle name. I didn't have time to display any features this week, but I can honestly say that I am amazed by your talent and so very thankful that you guys took the time to share your links with me.


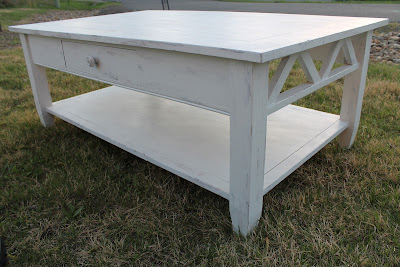
  Here is a sneak peek of my latest project- my dining room table. It's literally just a sneak peek- I haven't even edited the photos, but I'm sure you understand. I'm already loving this transformation and it's even prettier in person!


Okay, so onto the party! Y'all have fun and thanks for linking up!